
How to Make a Miniature Greenhouse from Cardboard (Easy 1:24 Tutorial)
- Difficulty
- Beginner
- Scale
- 1:24
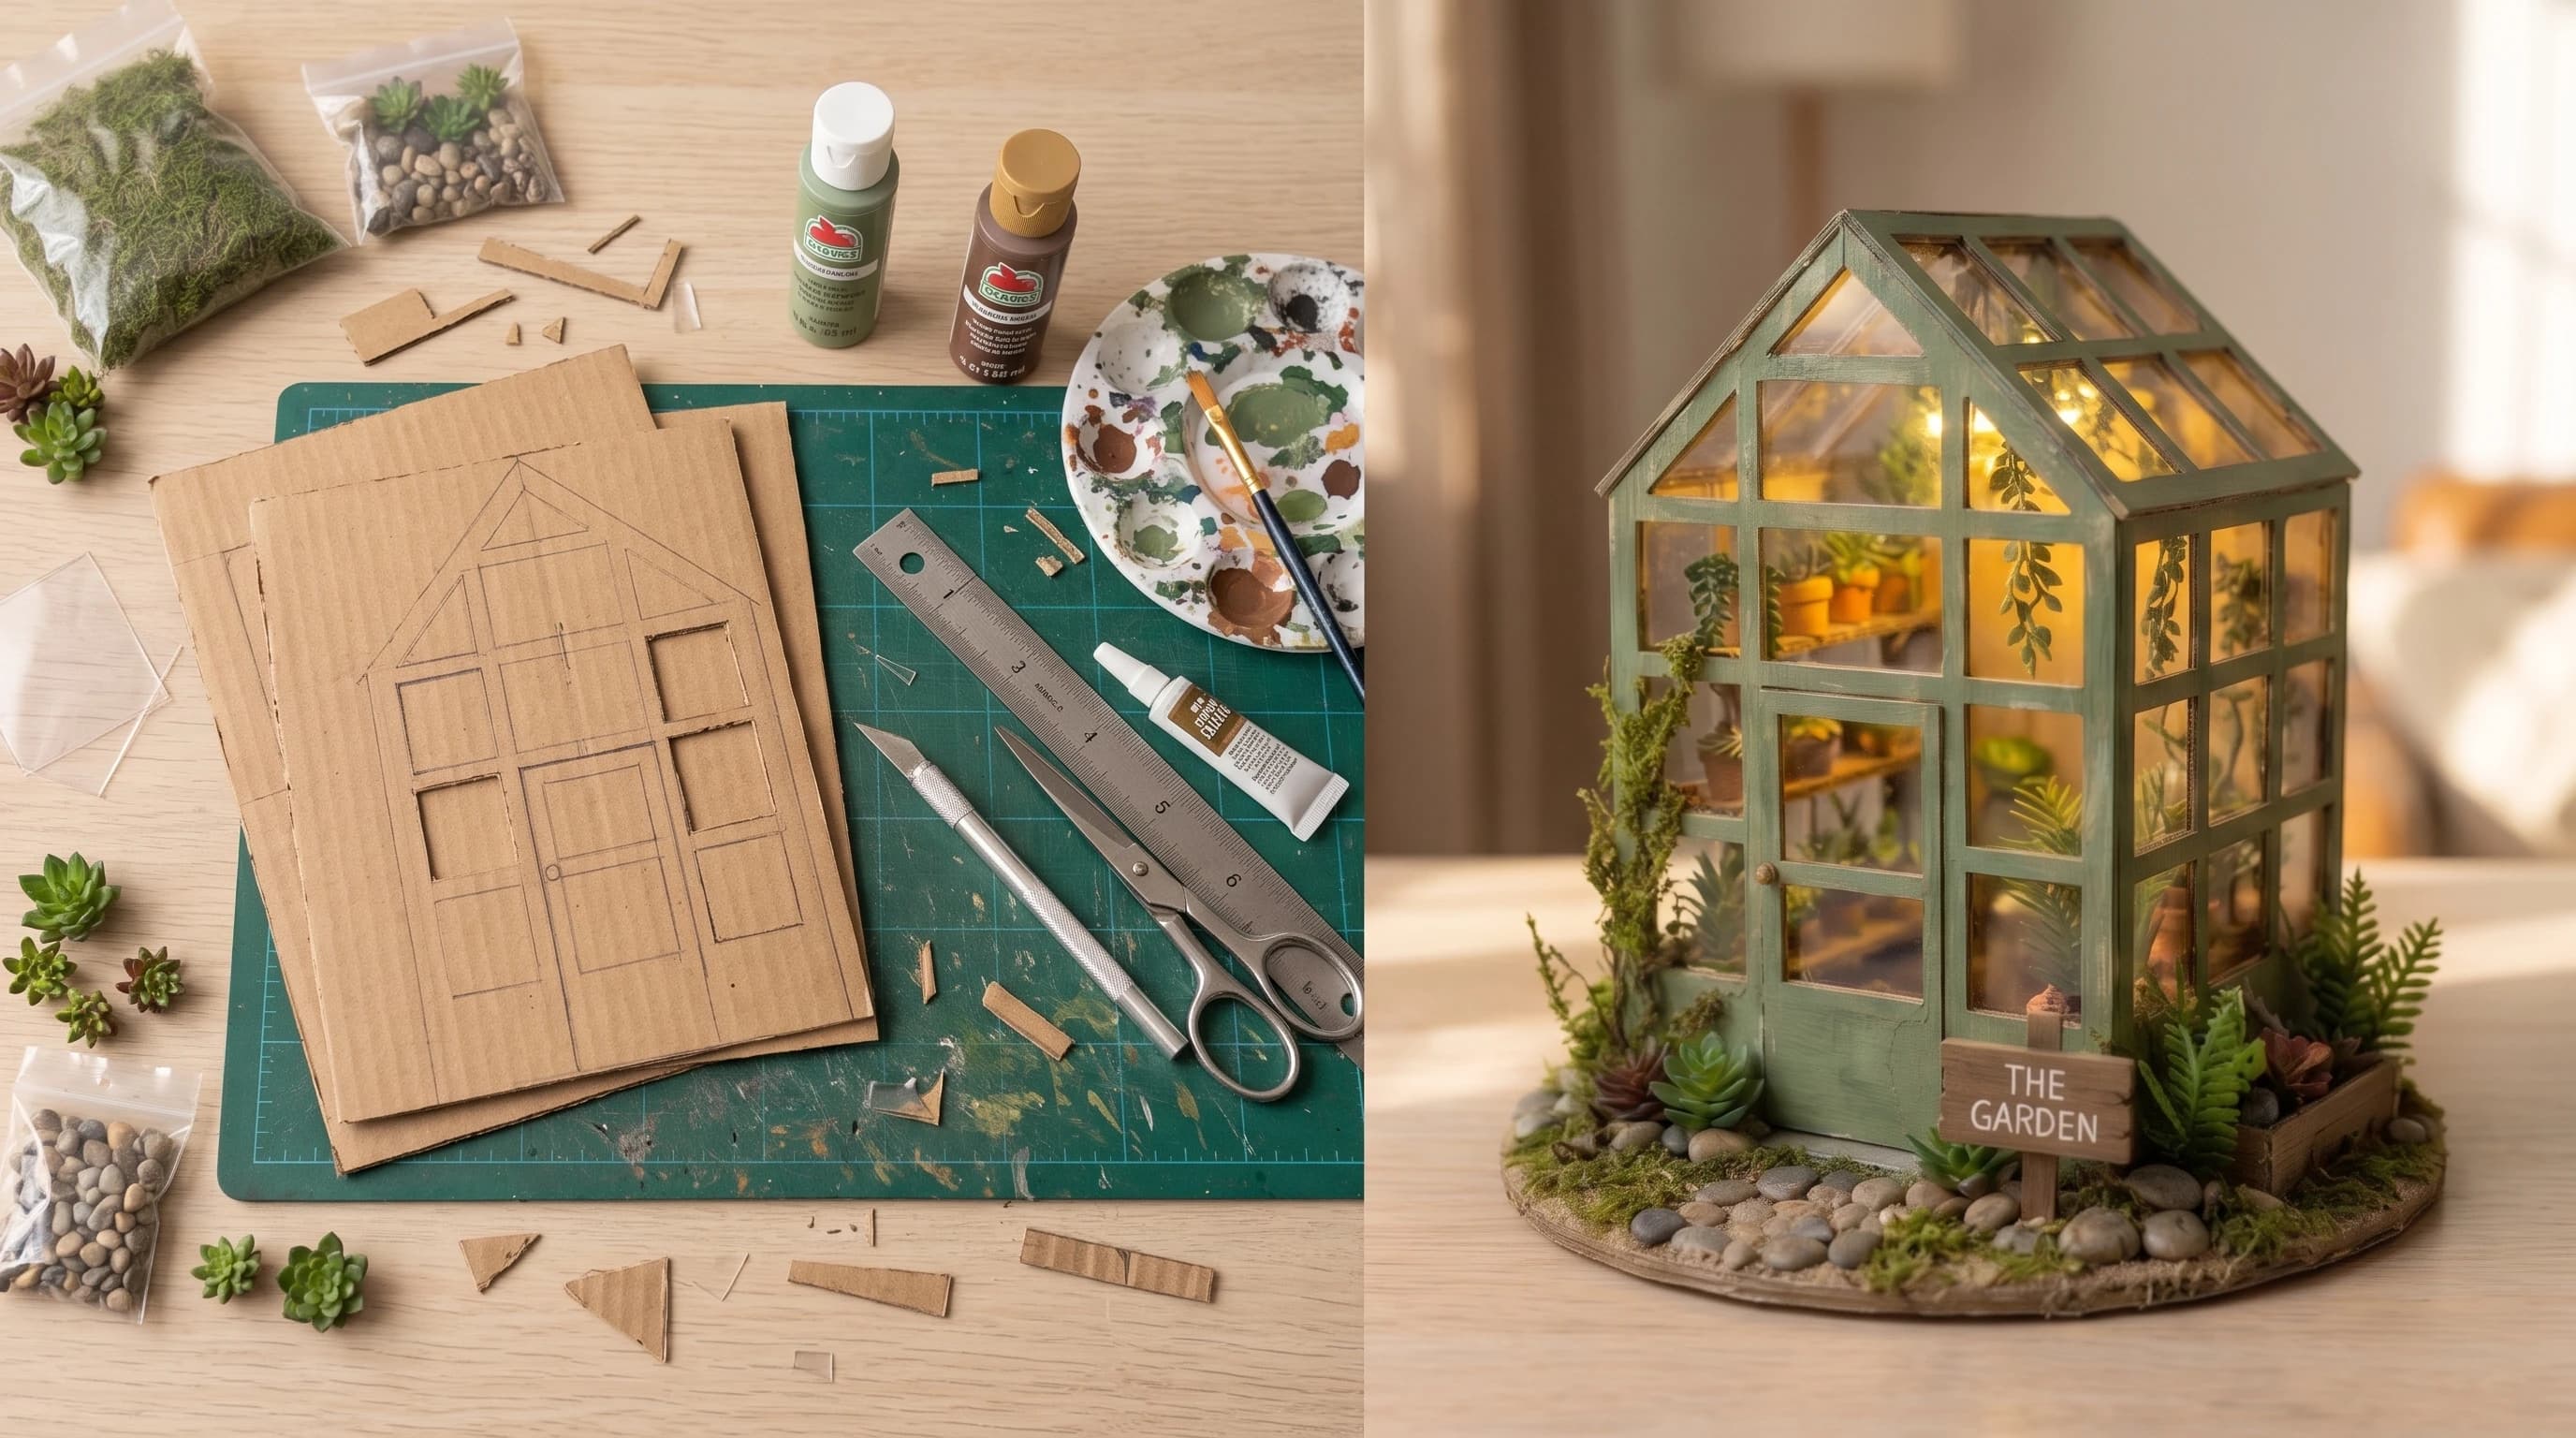
If you have ever wondered how to make a miniature greenhouse from cardboard, you are in the right place. This charming DIY project transforms everyday shipping boxes and clear plastic packaging into a stunning piece of 1:24 scale garden decor. Whether you want to add a beautiful botanical feature to your dollhouse collection or simply enjoy a relaxing weekend craft, this tutorial walks you through every single step. Best of all, it uses inexpensive recycled materials and requires no specialized power tools to achieve a truly professional, magical finish.

What You'll Need
The beauty of this project is that it relies heavily on upcycling. The main structure is built using standard single-wall corrugated cardboard—the kind you find in everyday shipping boxes. For the windows, you can salvage clear plastic from blister packs, toy packaging, or food containers. Because we are working in approximately 1:24 scale, you will only need small amounts of moss, pebbles, and paint to bring the scene to life. Make sure your cardboard is dry and free from heavy creases before you begin.
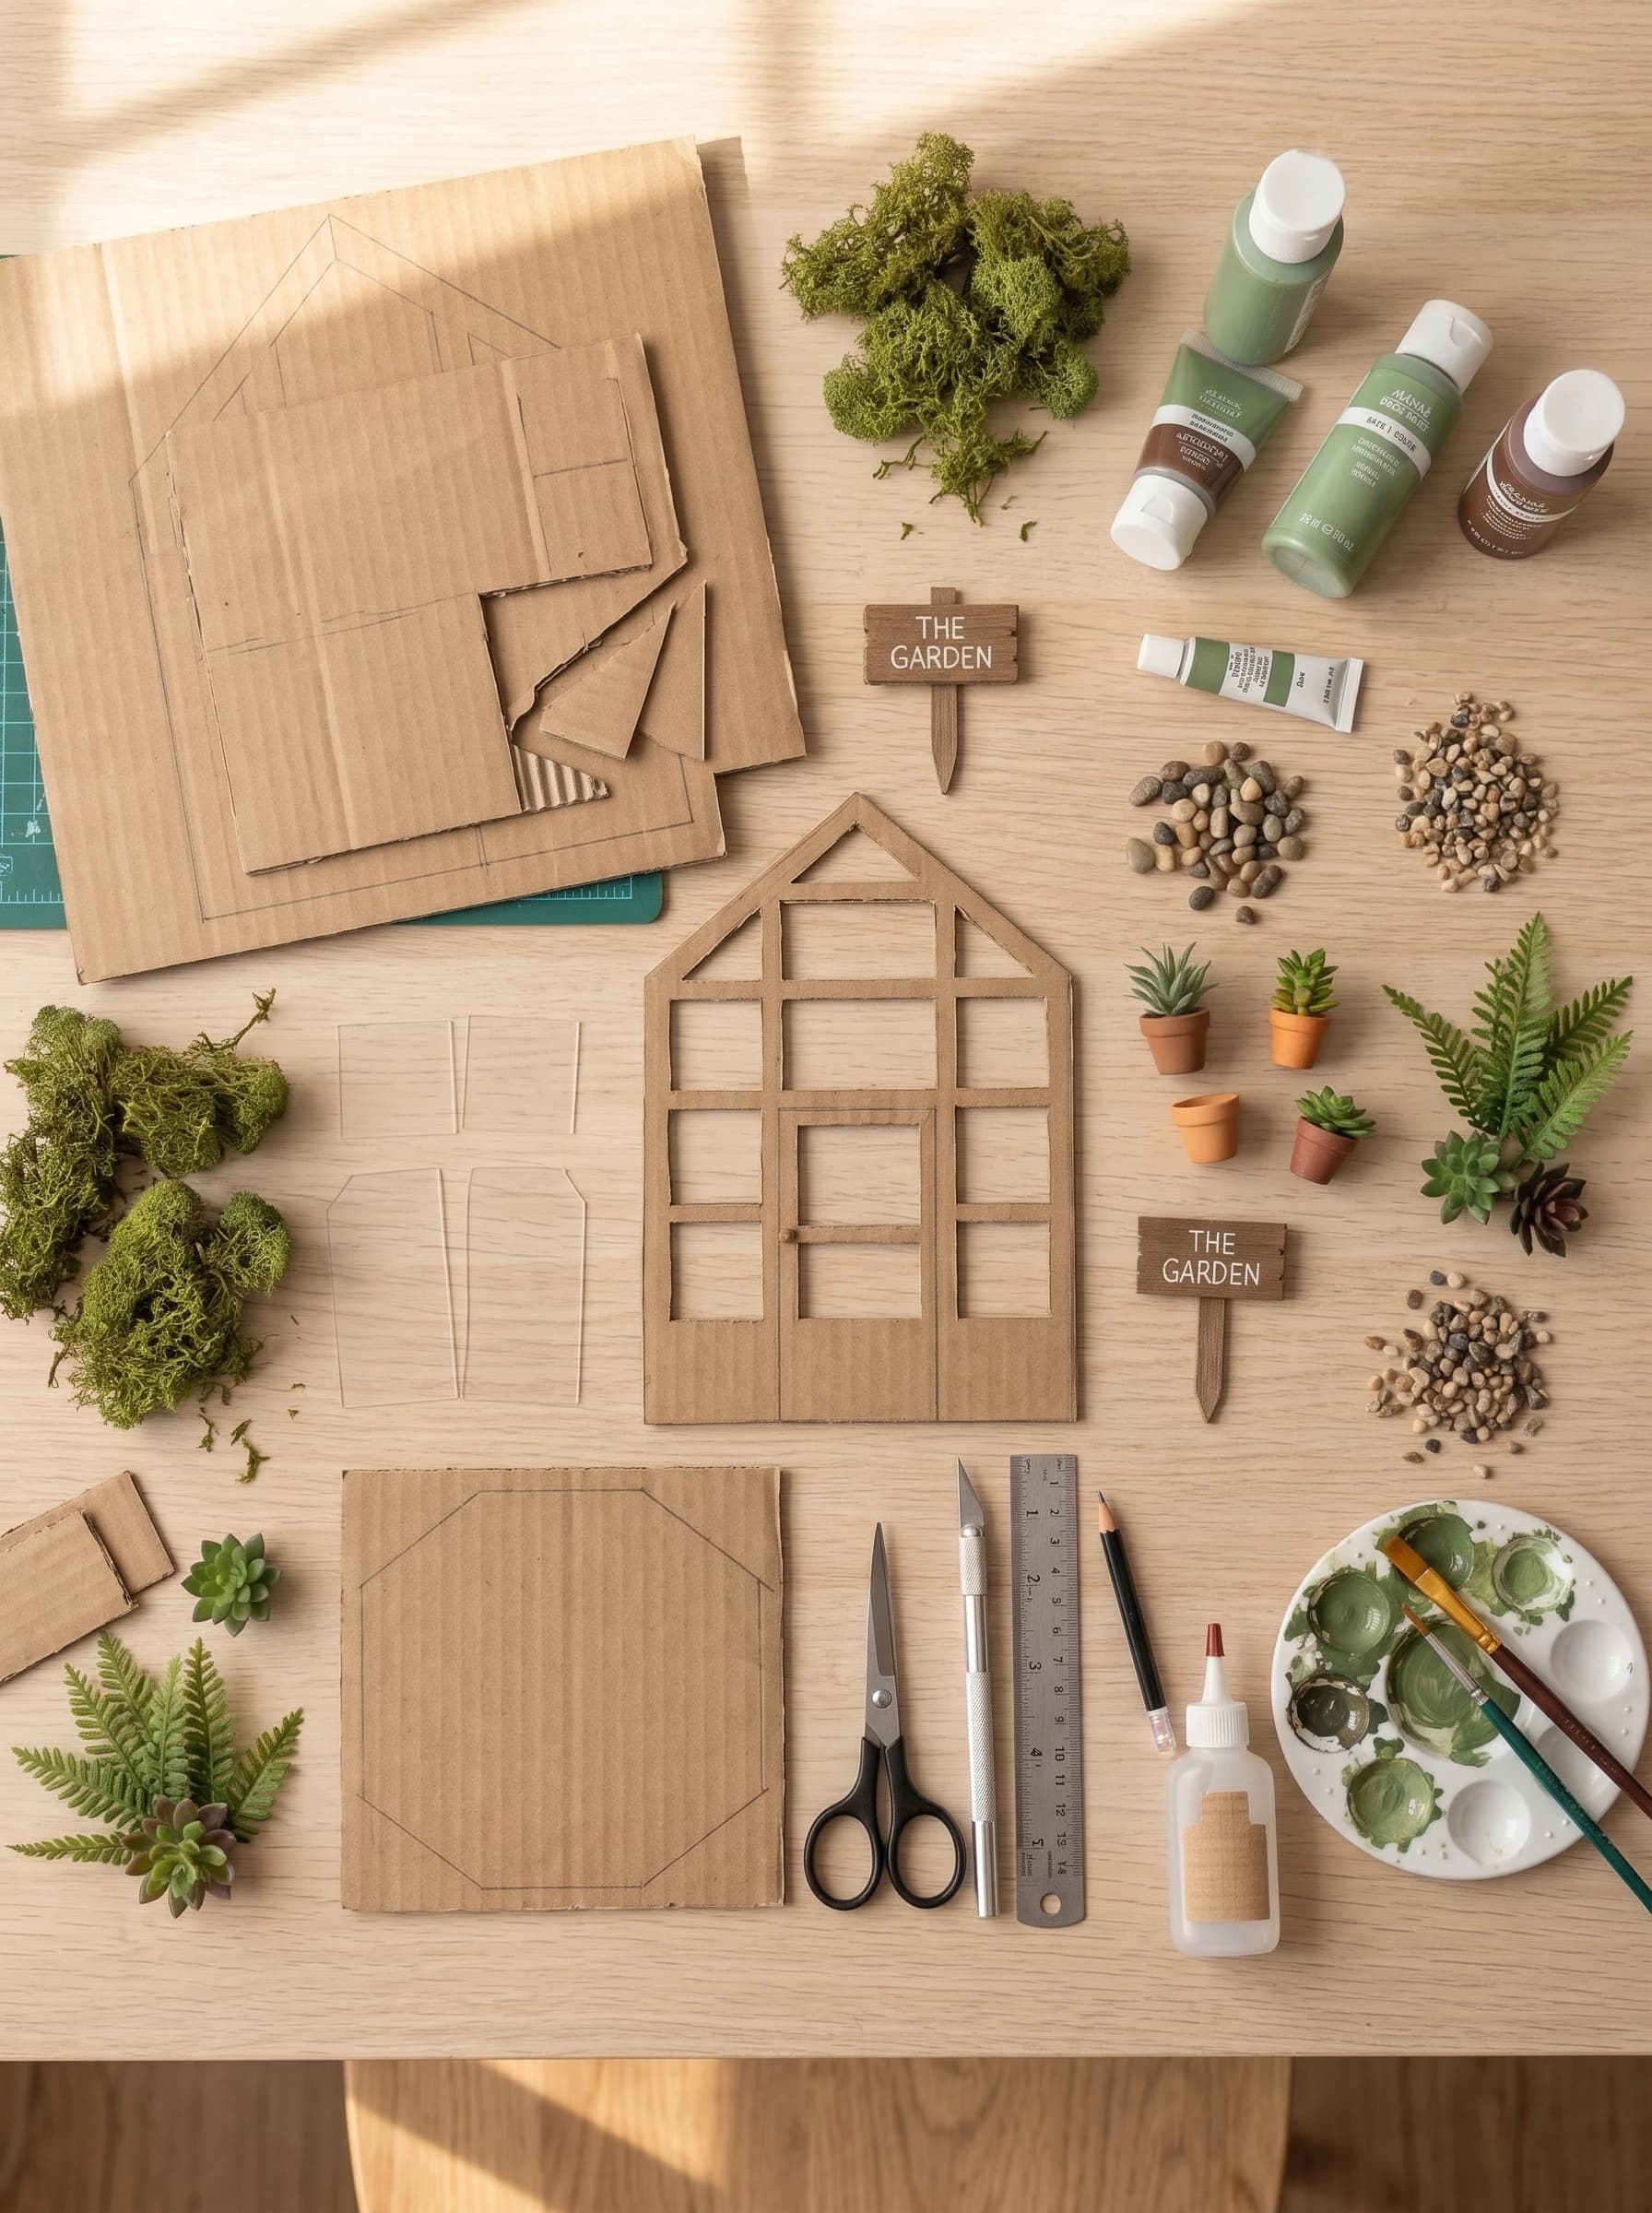
- Corrugated cardboardSingle-wall, uncreased pieces are best
- Clear plastic packagingRecycled from product boxes
- Acrylic craft paintSage green, brown, and white
- Miniature faux plantsTiny succulents, ferns, or paper leaves
- Craft moss and fine sandFor ground cover texture
- Small river pebblesFor the garden path
- LED fairy lightsWarm white, battery-operated wire string
- Miniature terracotta pots1:24 scale size
- Craft knife with fresh bladesEssential for clean window cuts
- Craft gluePVA or tacky glue with a precision applicator
- Fine-tipped tweezersFor placing tiny plants and pebbles
- Flat paintbrushesFor even coverage on the cardboard
- Metal rulerTo guide your knife for straight edges
Before You Start
Step 1: Cut the Cardboard Pieces
Start by drawing your greenhouse template directly onto the flat corrugated cardboard. You will need a large circular base (about 8 inches or 20 cm in diameter), two identical front and back pieces with peaked roofs, and two identical side walls. Carefully sketch out the grid for the window panes on the walls. Using your metal ruler and a very sharp craft knife, cut out the outer shapes first. Then, slowly and gently cut out the negative space for the windows. Do not rush this step; multiple light passes with the knife will yield much cleaner edges than trying to force the blade all the way through on the first try.

Step 2: Assemble the Walls and Roof
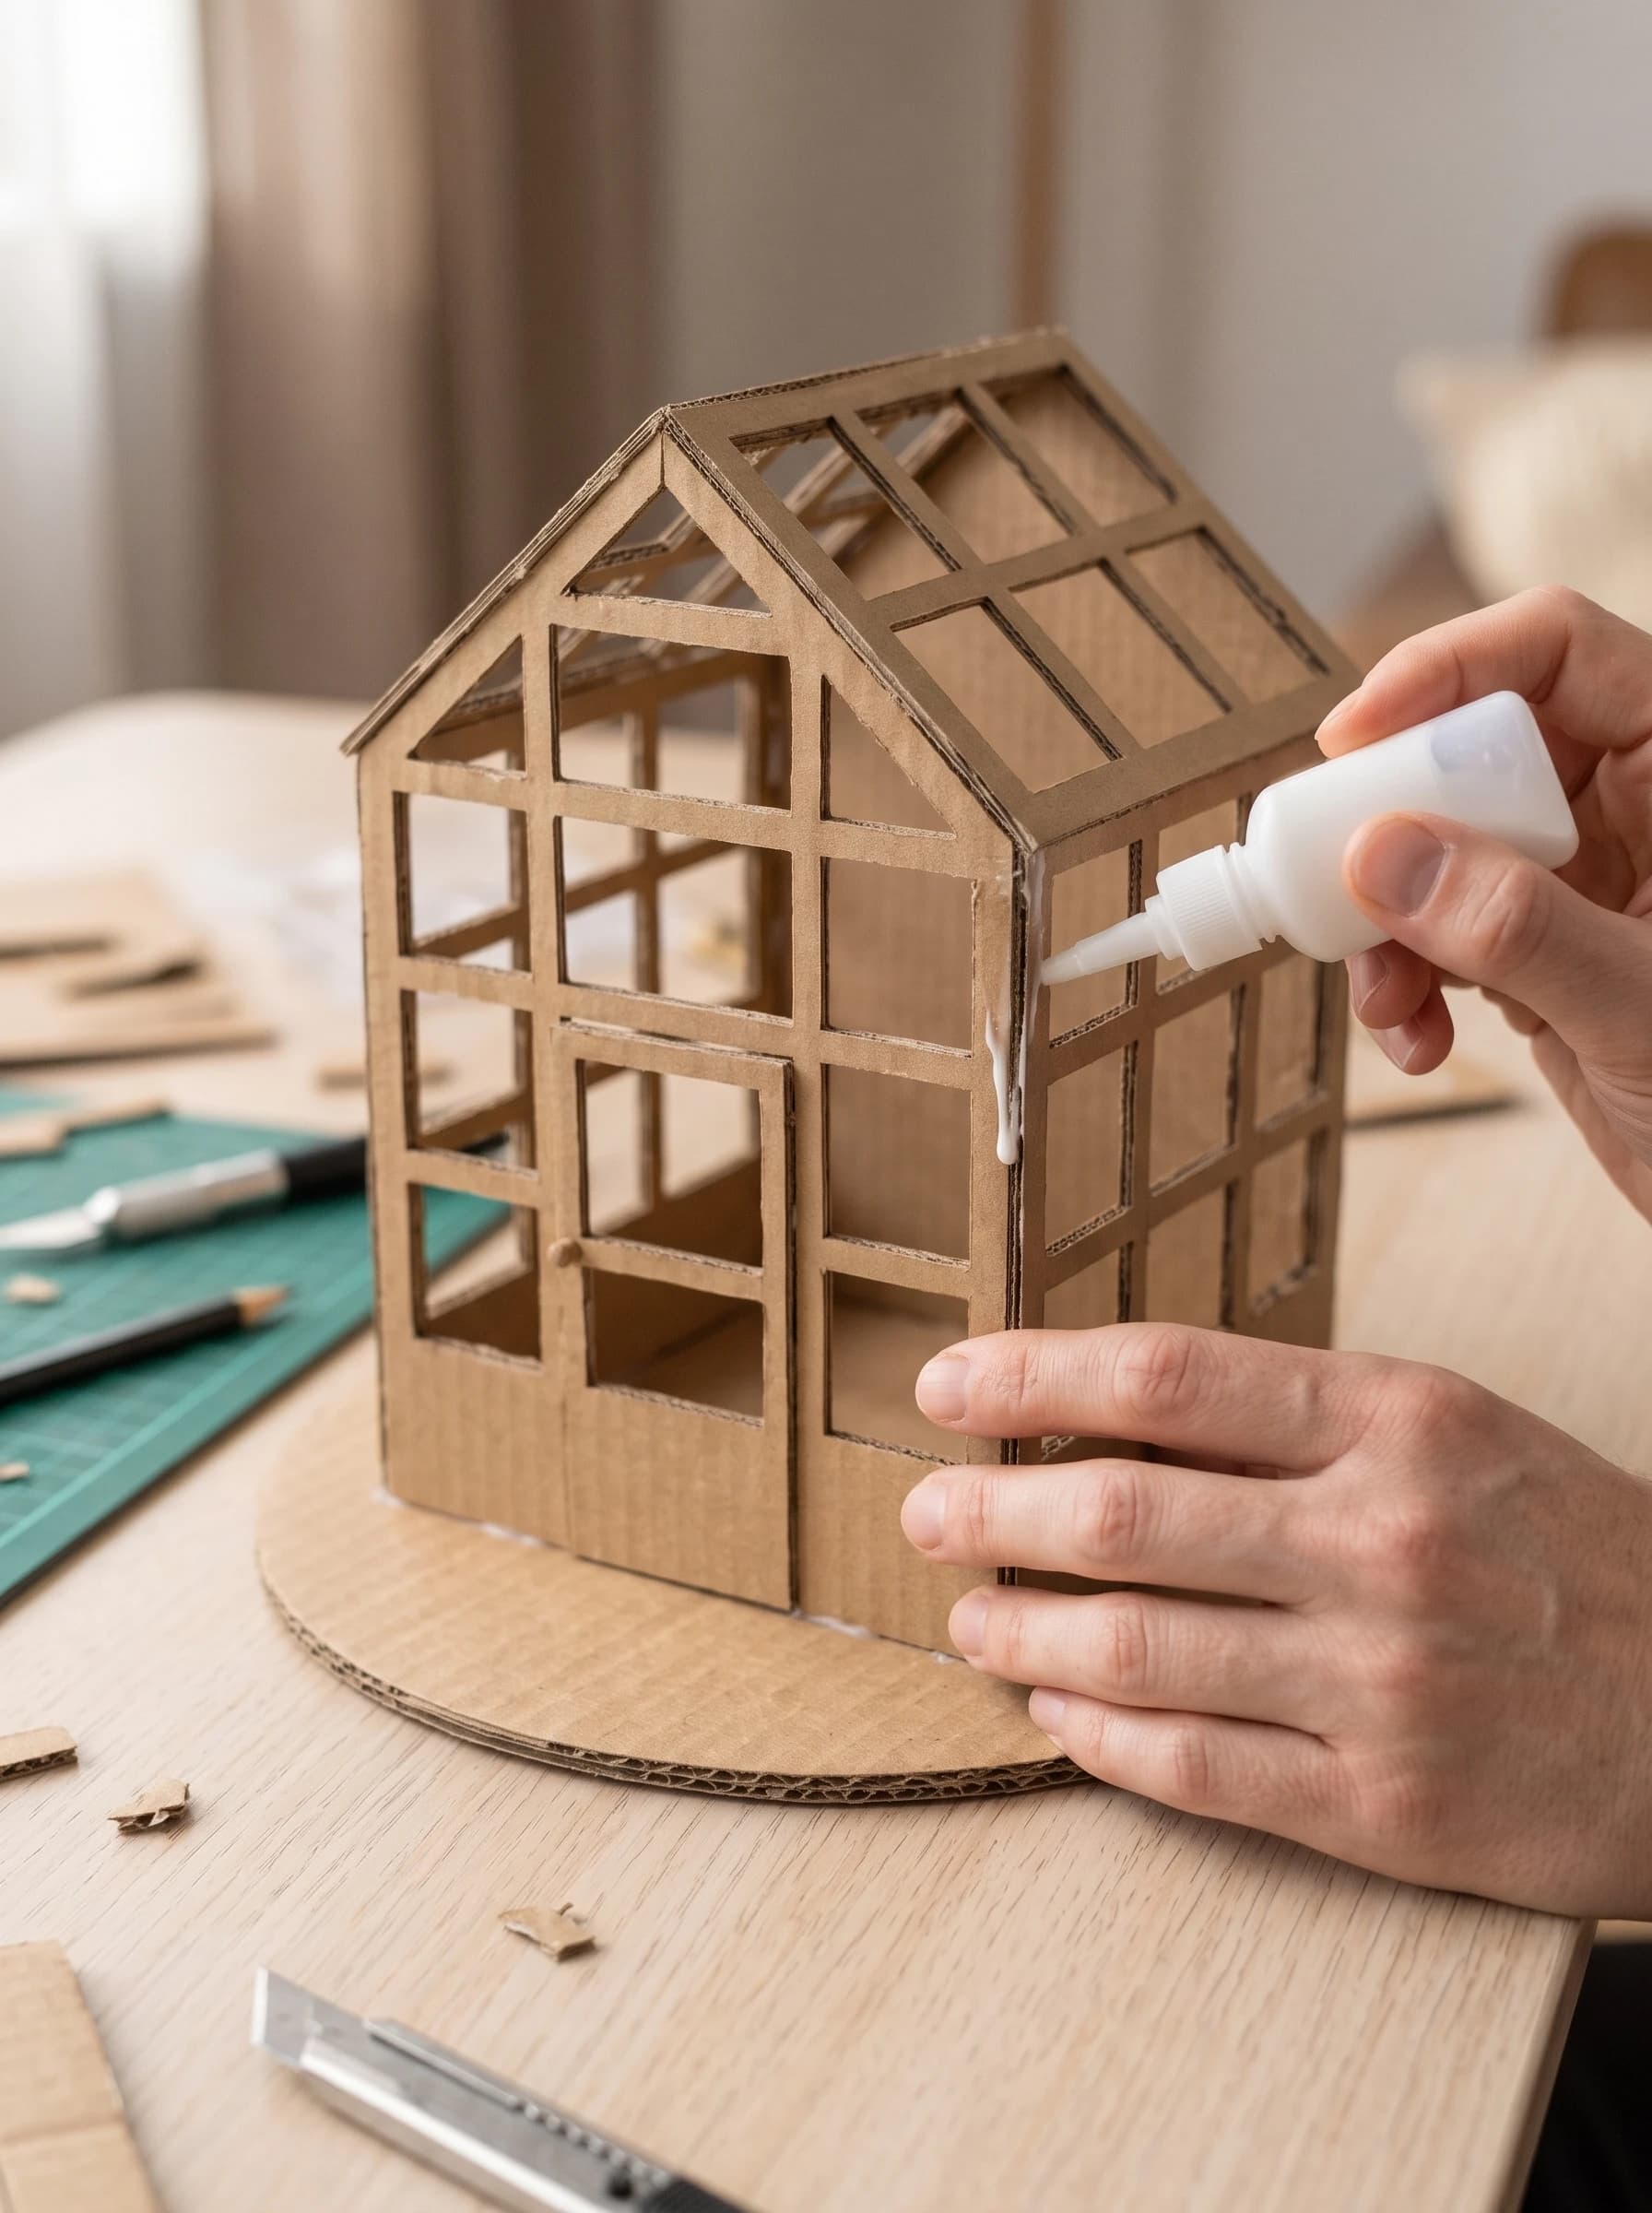
Once your pieces are cut, it is time to build the basic structure. Apply a thin, even bead of craft glue along the bottom edge of the back wall and press it onto the circular base, holding it perpendicular until the glue grips. Add the side walls one by one, applying glue to both the bottom edges and the side seams where the walls meet. Finally, attach the front wall. If your cardboard is thick, you can use pins to hold the corners together while the glue dries. Let the entire structure sit undisturbed for at least 30 minutes to ensure a solid foundation before you start painting.
Step 3: Paint the Structure
With the frame securely glued, use a flat paintbrush to apply acrylic craft paint to the cardboard. A muted sage green gives a lovely, vintage botanical feel. Paint both the exterior and the interior of the window grids. Cardboard is porous and will absorb moisture from the paint, so use thin coats to prevent the material from warping. You may need two coats to fully cover the brown color and any printed text on your recycled boxes. Allow the paint to dry completely—usually about 45 minutes—before handling the structure again.

Step 4: Attach the Clear Windows
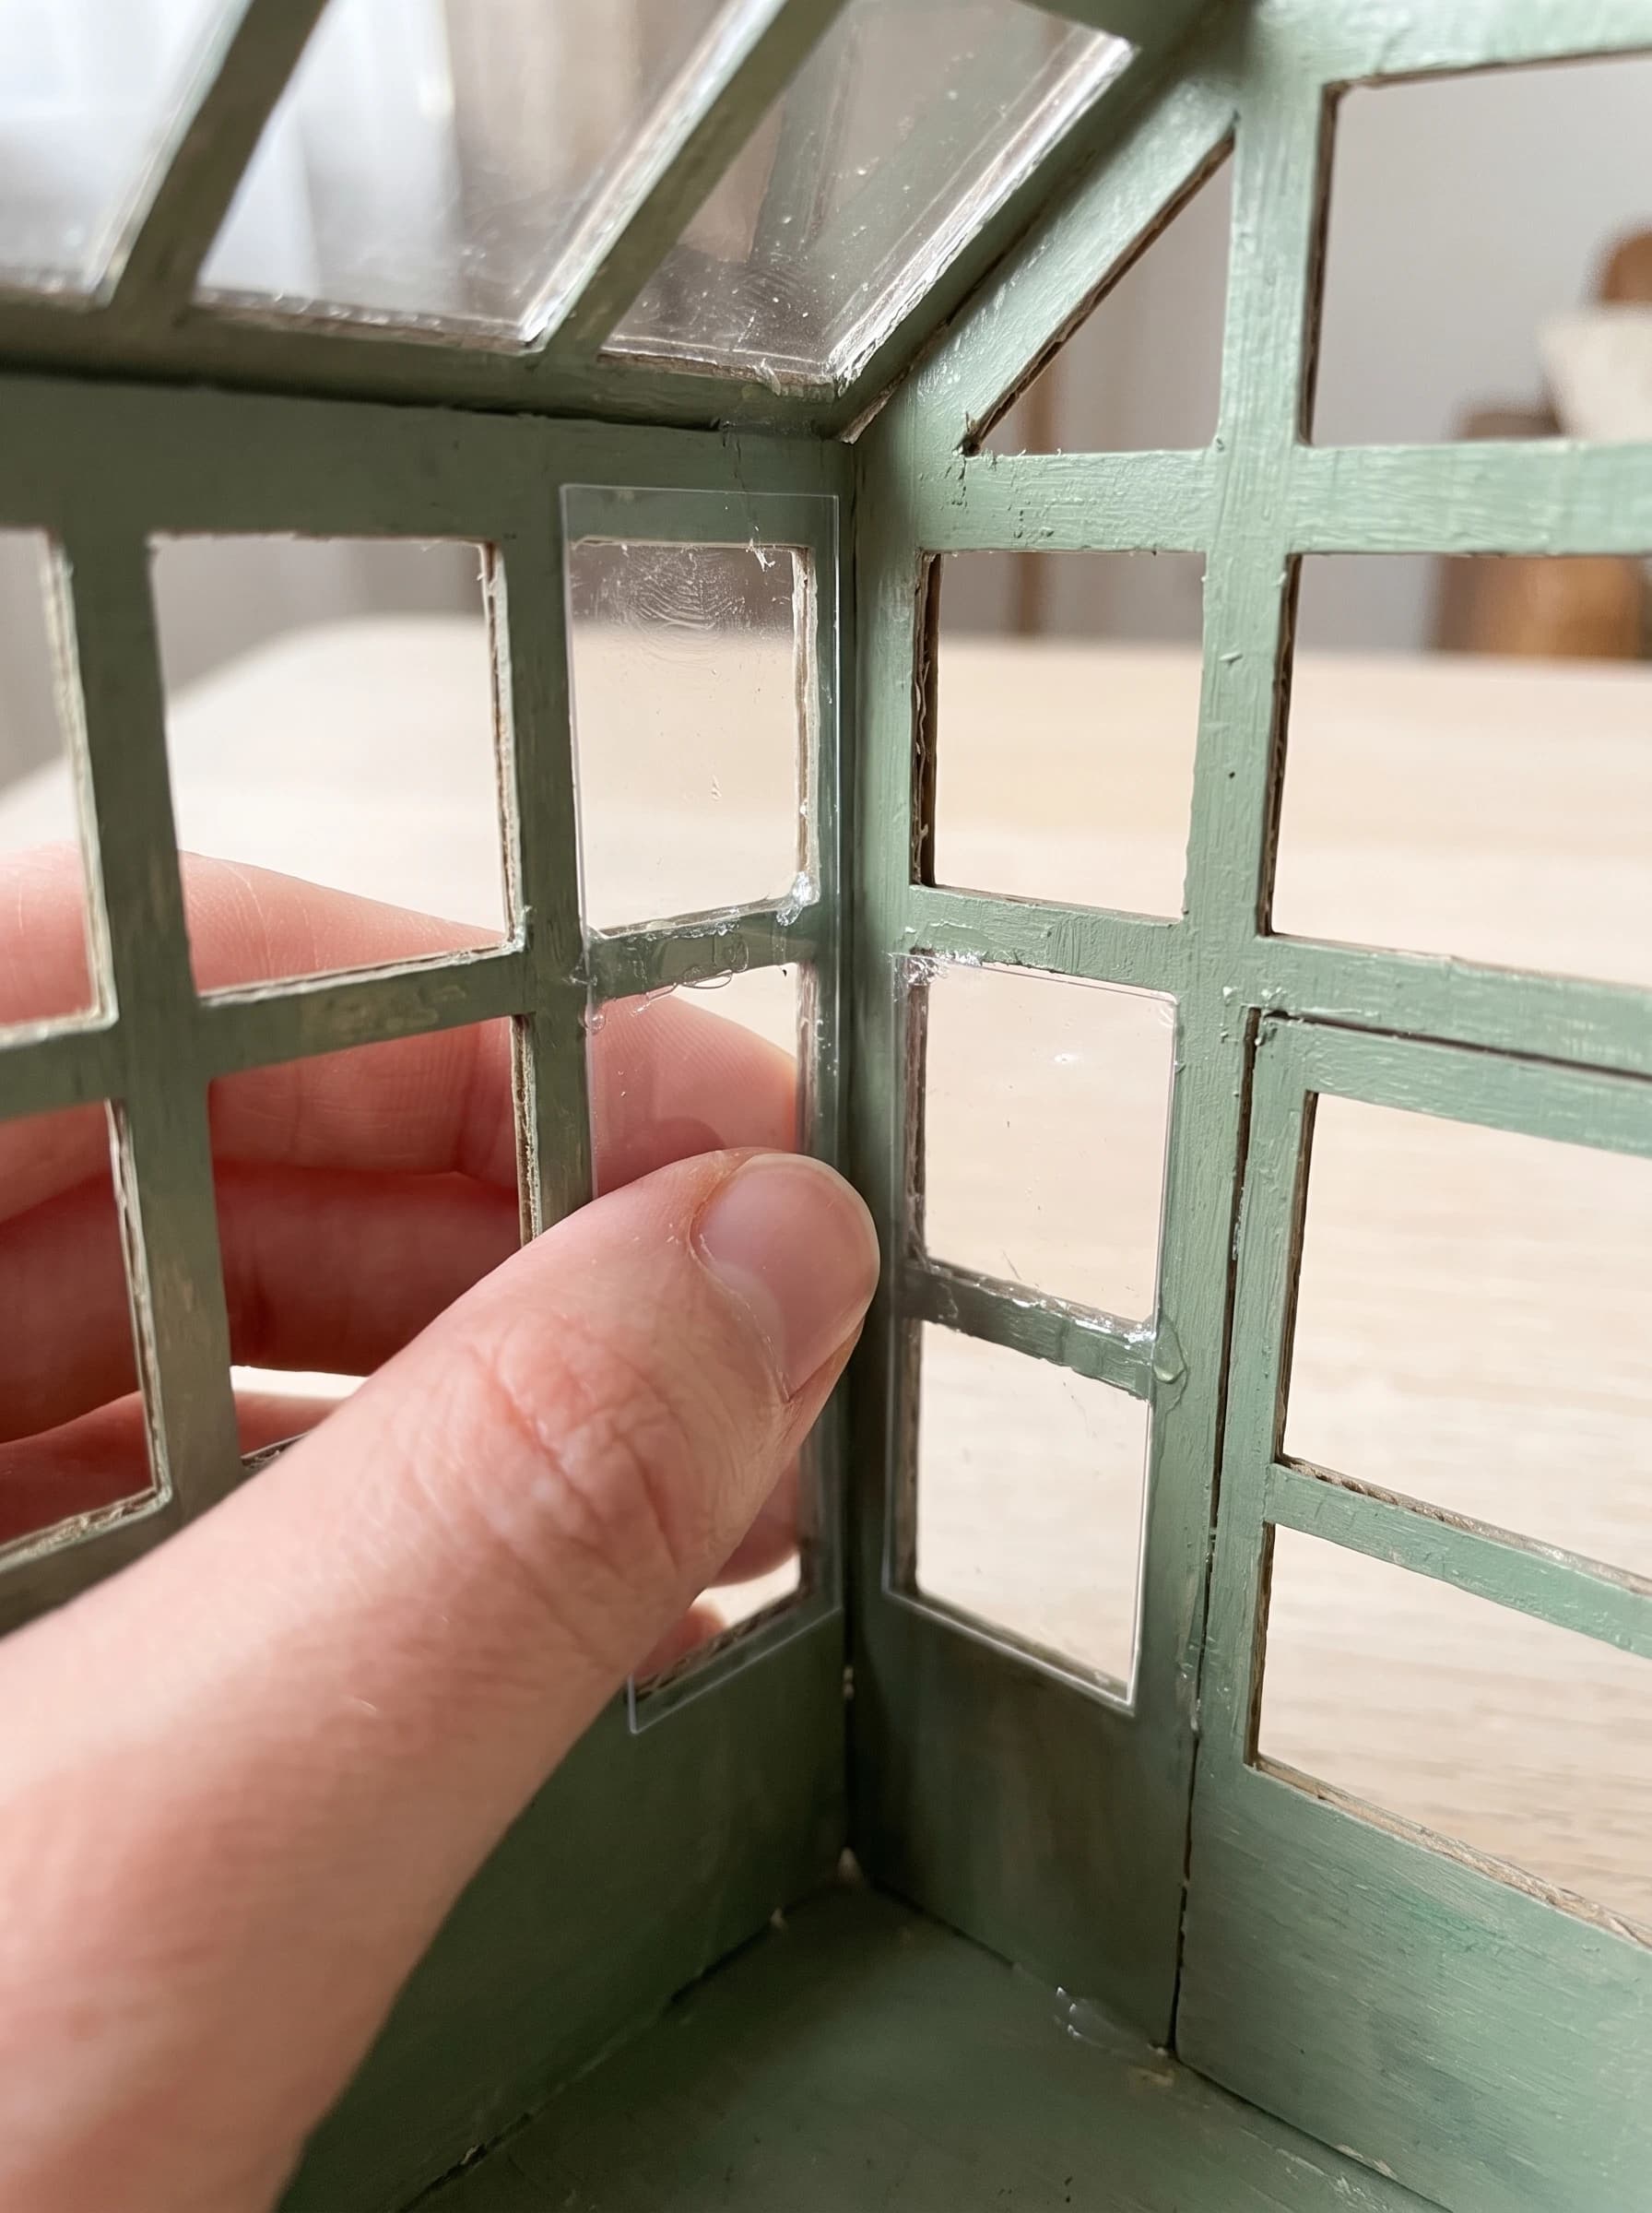
To create the glass panes, cut your recycled clear plastic packaging into large rectangles that fit slightly inside the interior dimensions of your greenhouse walls. It is much easier to glue one large sheet of plastic to the inside of the wall rather than cutting dozens of tiny individual window panes. Apply tiny dots of glue to the back of the painted cardboard grid and carefully press the plastic sheet into place. Avoid using superglue or hot glue here, as the fumes from superglue can frost the plastic, and hot glue will create bulky, messy seams.
Step 5: Decorate with Moss and Plants
Now comes the most rewarding part: landscaping. Using a precision glue applicator, spread glue around the exterior base of the greenhouse. Sprinkle fine sand and craft dirt over the wet glue to create realistic soil. Next, use fine-tipped tweezers to carefully place craft moss, tiny river pebbles, and miniature succulents around the foundation. You can even glue strands of moss creeping up the sides of the cardboard frame to give the greenhouse an aged, overgrown appearance. Take your time arranging the miniature terracotta pots to create visually interesting clusters.
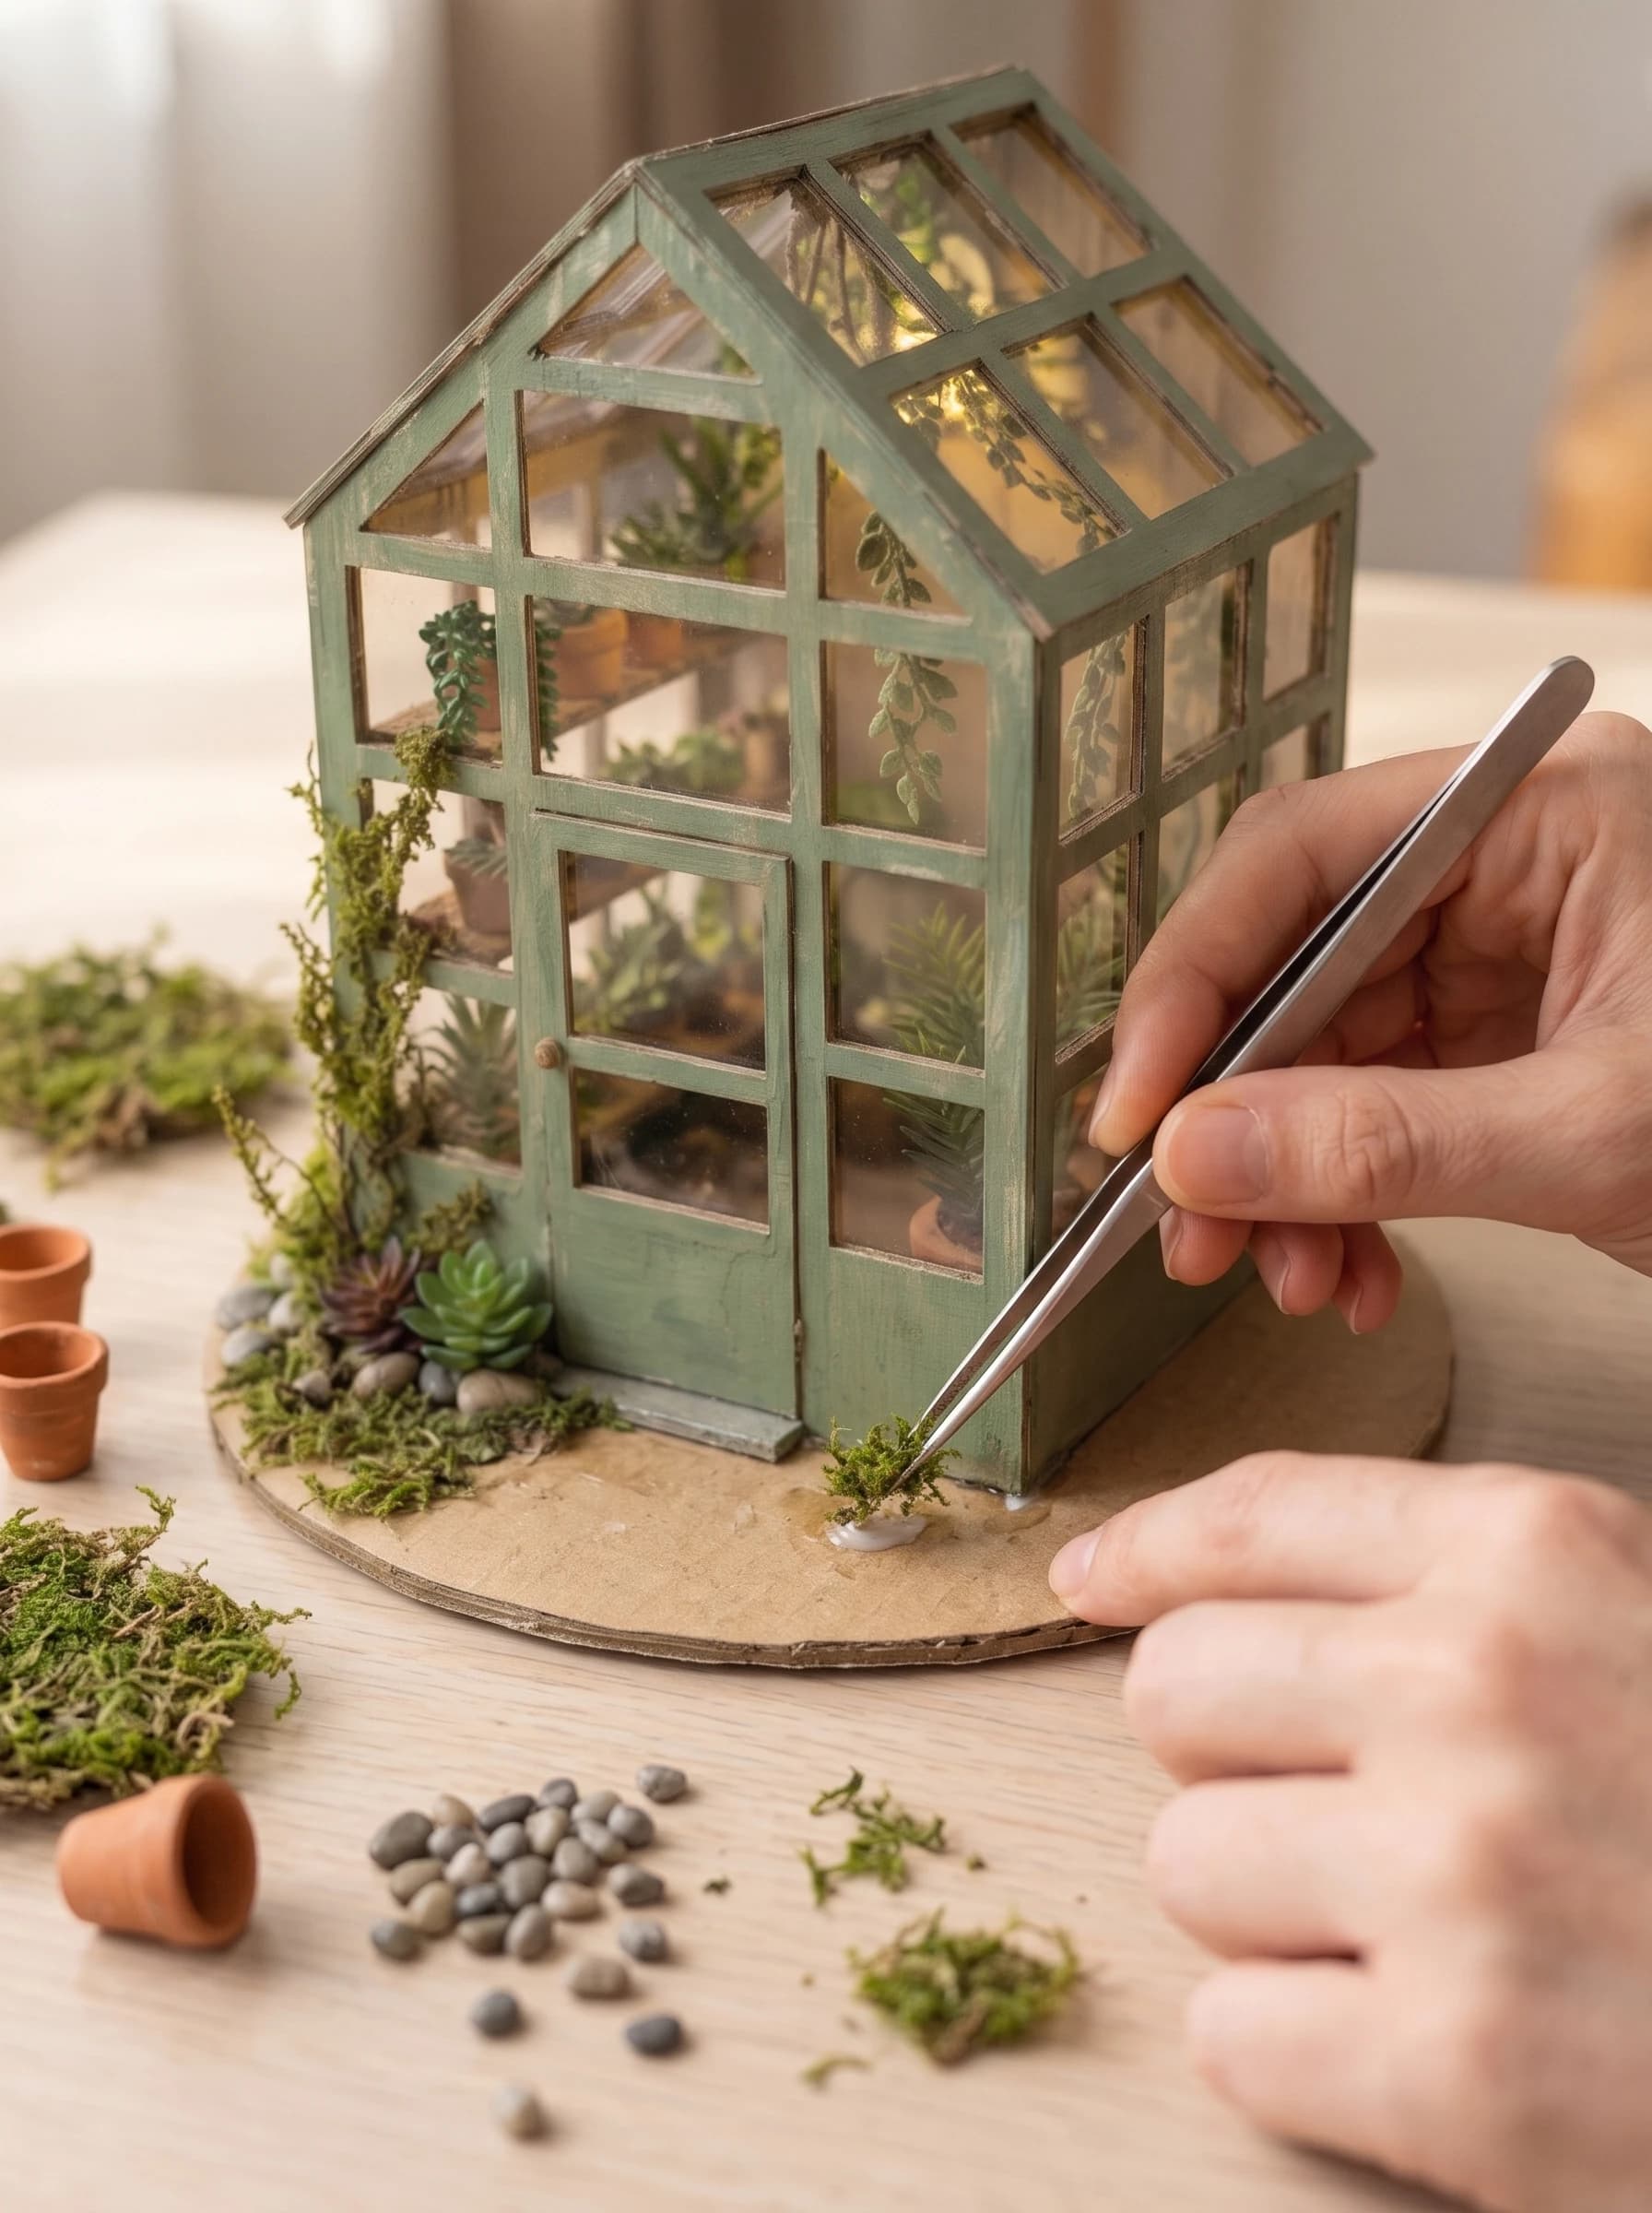
Step 6: Add Lighting and Final Details
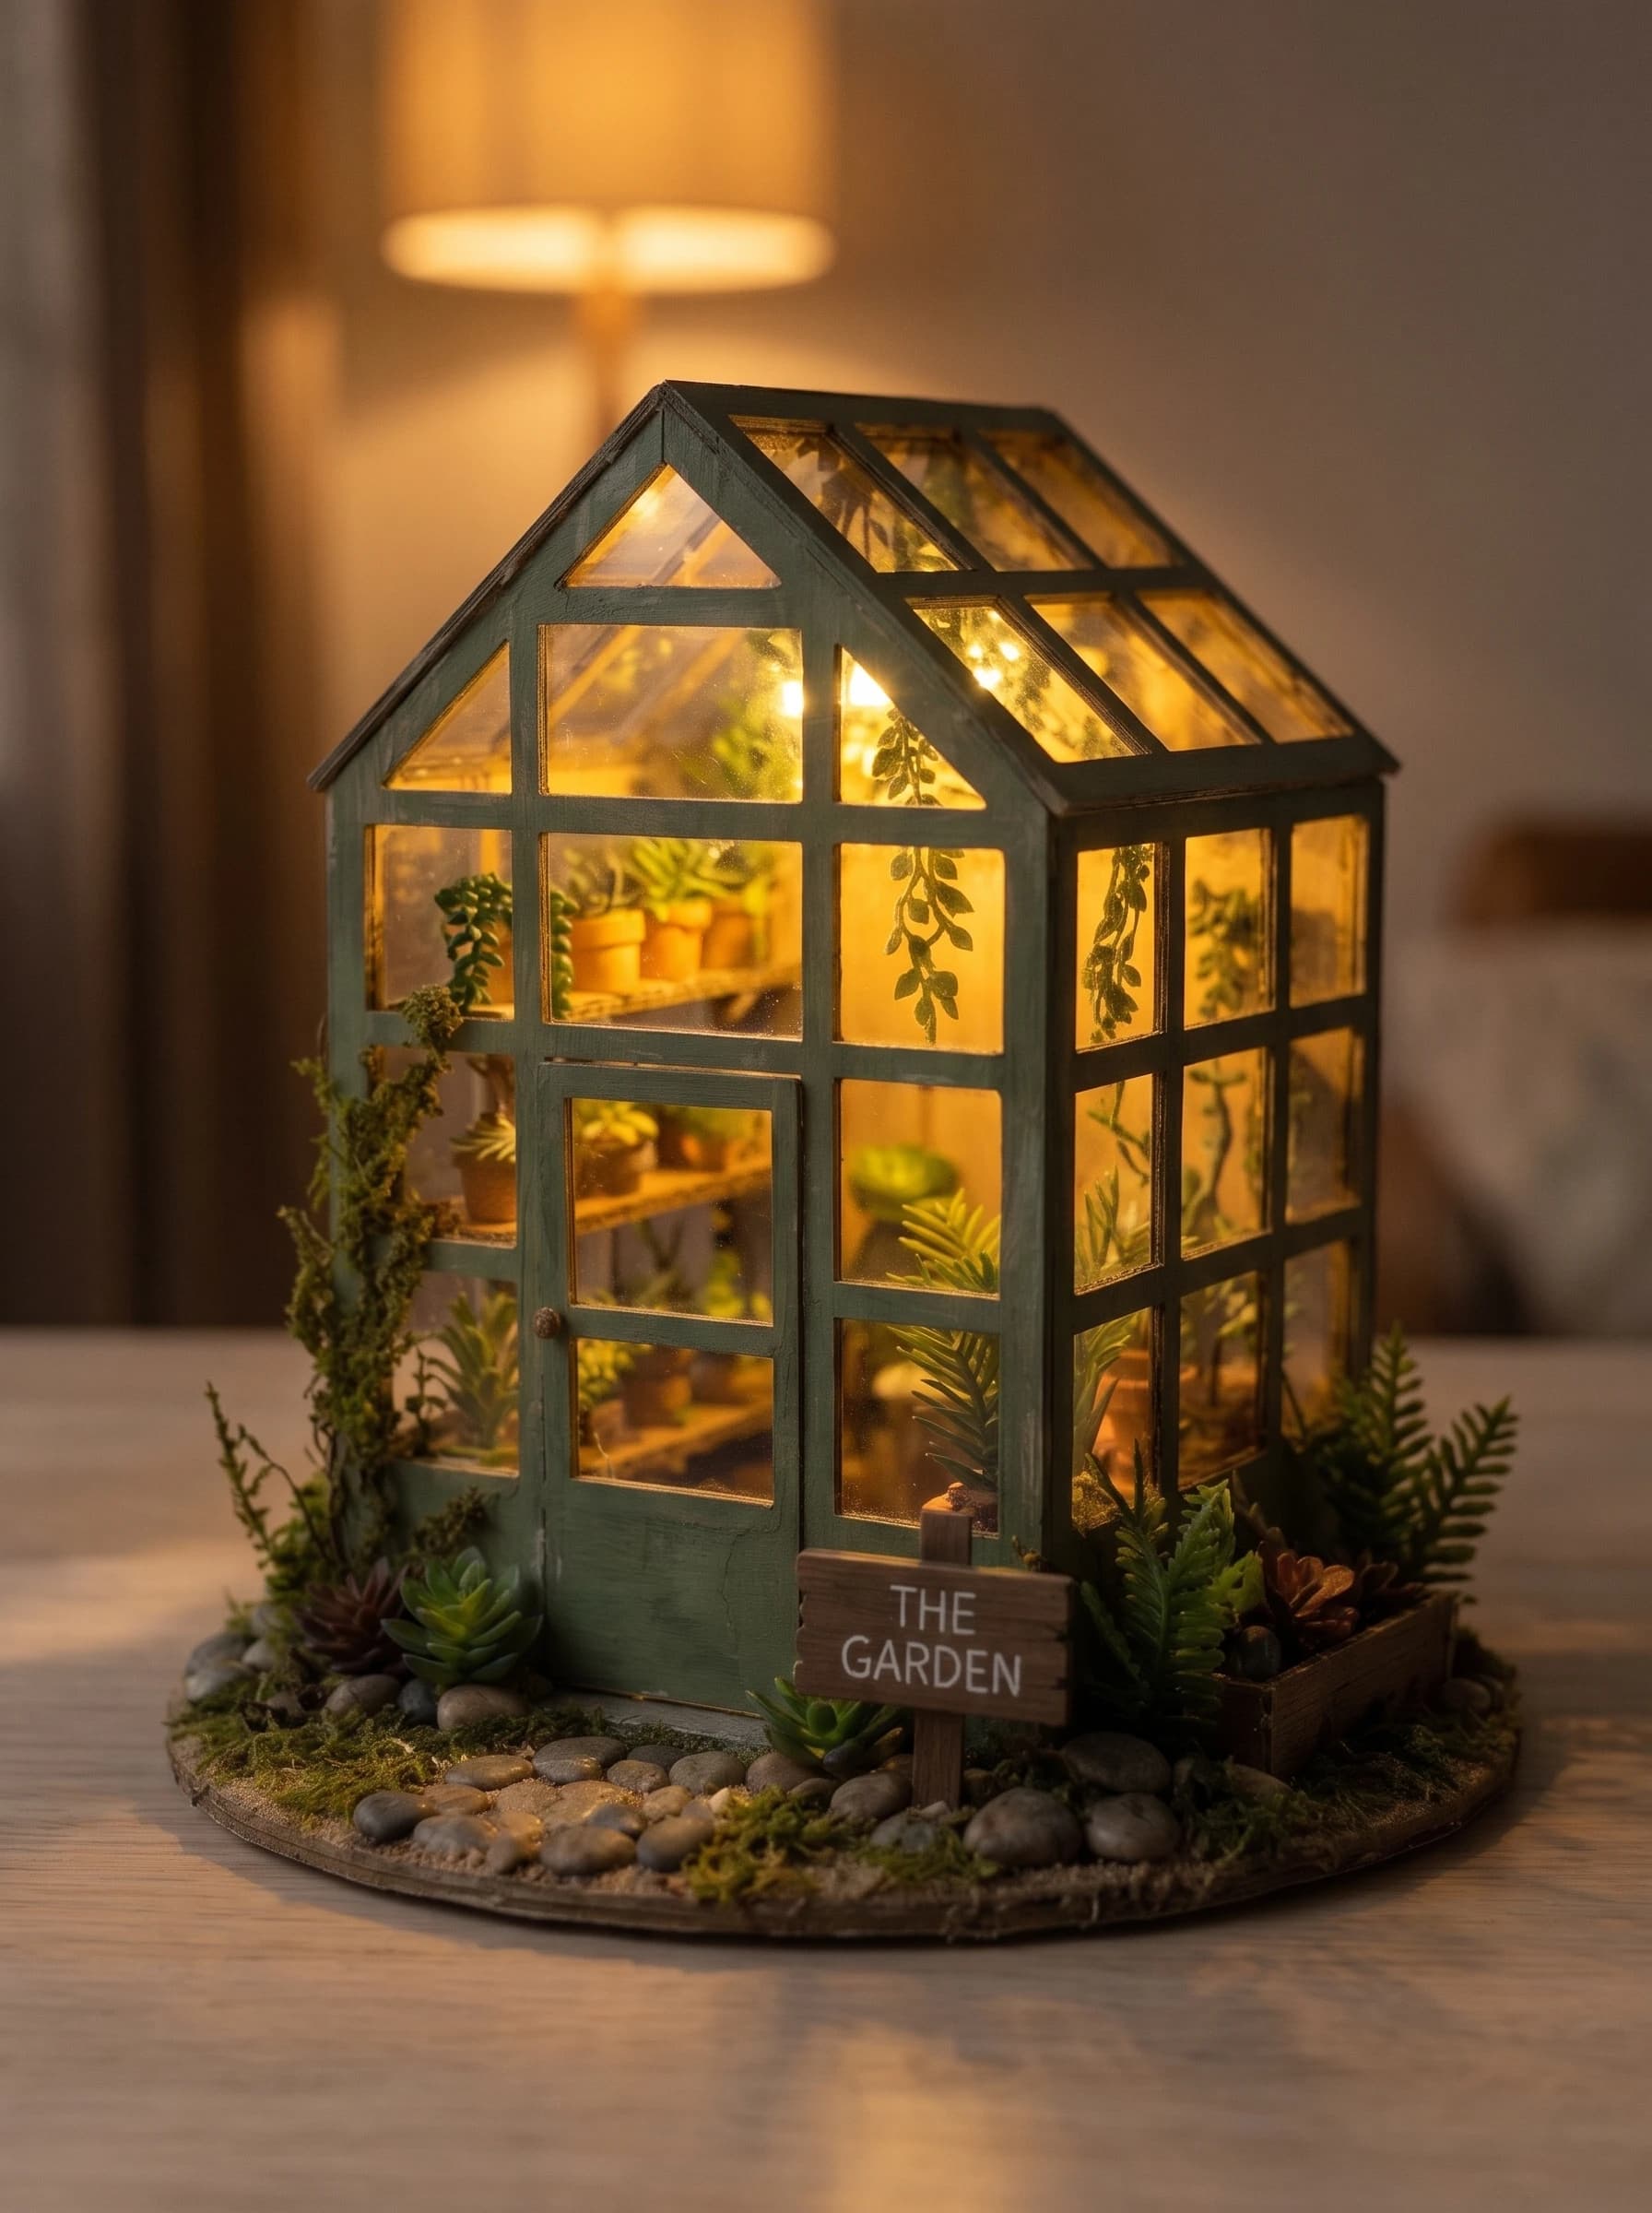
To bring your miniature greenhouse to life, thread a short string of battery-operated LED fairy lights through the roof or a small hidden hole in the back wall. Warm white lights work best to mimic cozy sunlight. You can secure the thin wires to the interior ceiling using tiny dabs of glue or small strips of clear tape. Finally, glue a few wooden dowels inside to act as plant shelves, and arrange your remaining tiny pots and ferns inside so they are beautifully illuminated when the lights are turned on.

The Finished Project
Tips for a Professional Finish
- Always use a metal ruler and a fresh blade for the cleanest window cuts.
- Seal the raw edges of the corrugated cardboard with a thin layer of glue before painting to hide the fluting.
- Paint your structure with dry-brush techniques using a tiny bit of brown paint to add faux dirt and weathering.
- Wipe away any excess glue on the clear plastic immediately with a damp cotton swab before it dries.
- Vary the heights and textures of your miniature plants to make the garden look organic and natural.
Frequently Asked Questions
Can I use hot glue instead of craft glue?
While hot glue dries faster, it is not recommended for this project. It creates thick, bulky seams that ruin the miniature scale and can warp the clear plastic windows. Stick to PVA or tacky craft glue for precise, clean lines.
How do I hide the corrugated edges of the cardboard?
You can hide the wavy edges of corrugated cardboard by applying a thin layer of spackle or a thick bead of craft glue along the edge. Once it dries, gently sand it smooth and paint over it.
Where can I find clear plastic for the windows?
Look in your recycling bin! The transparent plastic from toy packaging, electronic blister packs, or clear bakery containers is perfect for miniature windows. Just ensure it is clean and free of scratches.
How long does this project take to complete?
Depending on how intricate you make the interior details, expect to spend about 3 to 4 hours on this project, plus additional drying time for the glue and paint.
Conclusion
Learning how to make a miniature greenhouse from cardboard is a fantastic way to practice your scale modeling skills while upcycling materials you already have at home. By taking your time with the knife cuts and layering textures like moss and pebbles, you can achieve a highly realistic finish that rivals expensive kits. If you enjoyed building this botanical retreat, be sure to check out our other cardboard miniature guides or explore more 1:24 scale dollhouse ideas to expand your tiny world.
More in this topic: all Cardboard tutorials